"I applaud the engineering that went into this design. Bravo!"
Kevin Kelley
I received my MV-90 today. When I got home from work, I installed it. My story is probably very familiar to you:
We have a small laundry room, especially after we added a vertical storage cabinet to the right of the washer/dryer, which completely walled-in the dryer and the washer into a 60" space with wall cabinets above.
We have a set of LG front-load units on pedestals. We are expecting a new set to arrive on Saturday. So I wanted to improve the venting solution.
Our house is set up for a dryer on the left; unfortunately the LG washer door is not reversible, so my wife wanted the washer to the left of the dryer to avoid door conflicts.
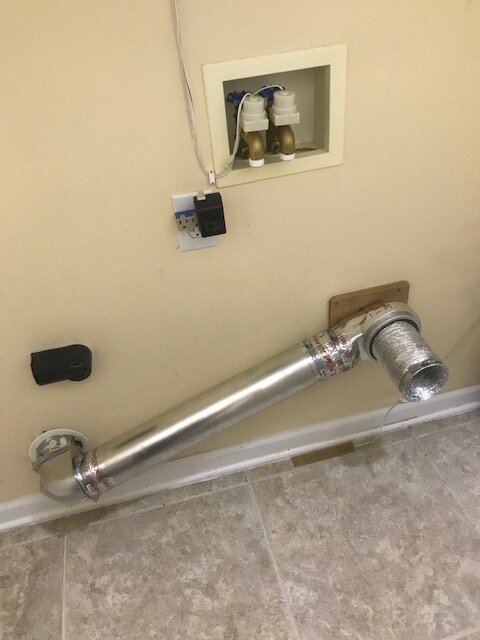
So that meant I had to run a vent from behind the washer to the right about 2.5 ft.
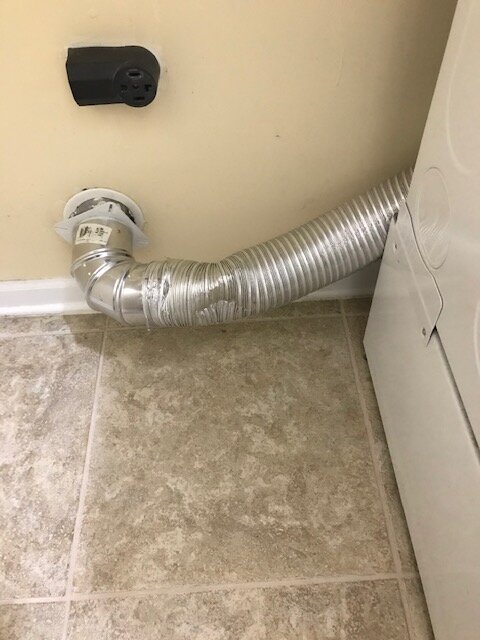
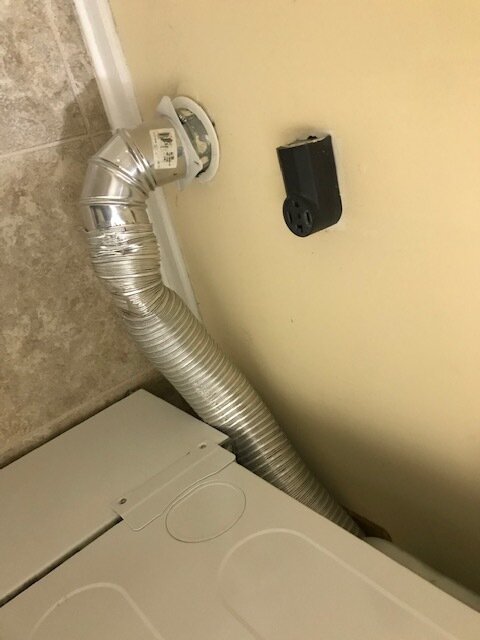
Last time I rebuilt the vent, I used the flexible, semi-rigid dryer vent , the kind that's fairly sturdy and not cheap. (This was not the vinyl fire hazard vent.)
The problem was, whenever we pulled the dryer out, we almost had to remove the washer from the laundry room to hook-up the dryer vent again. There was just no room to get back there without leaving a lot of extra vent (and I am neither skinny nor flexible anymore either).
Of course that made it very difficult to clean and eventually the vent got partially crushed at the elbow into the wall.
Luckily our dryer vent-run to the outside outlet is only 18" from the laundry wall penetration, so it still worked fairly well.
But when I took it apart to get ready for the new washer/dryer, last weekend, I could not believe how much lint was stuck in the flex-vent duct.
I found your product while surfing the web looking for a better solution. When I saw your product, I knew it was the right solution for me. I applaud the engineering that went into this design. Bravo!
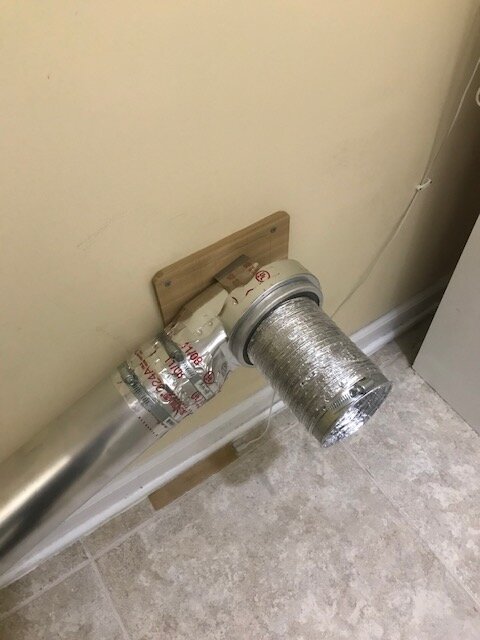
I just installed and test-fitted it to my old dryer. There is no guarantee the new vent is in exactly the same place, but I took photos of an LG dryer similar to our new one at the store and it has to be close. LG does not seem to have made any changes to the back of this class of dryer in the ten years since our last new one.
Parts for my new vent set-up:
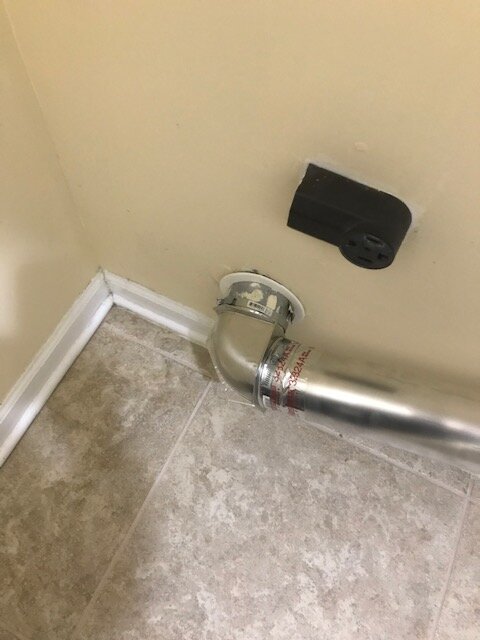
One Whirlpool-brand, close-fit 90-degree 4-inch elbow from Amazon
One 2-foot x 4-inch aluminum rigid dryer vent and a couple of vent clamps from Home Depot
One short male-male 4-inch connector to give me the couple of extra inches I needed to put the MagVent into position
One 6" salmon cedar plank screwed to the wall to make it easier to position the MagVent bracket
I had the Nashua foil tape already.
I dry-fitted everything tonight and made sure my measurements were correct. I then taped it all together, put vent clamps at all the unions and screwed it to the wall. Perfect fit.
All in all, I am so happy with the results. I don't think we will have the leaks that sent dryer lint to every corner of the room now that everything is rigid vent duct. And I am expecting to be able to pull the dryer in and out without a headache every time.
(Oh - in case you are curious, the electric gizmos on my washer faucets are part of a FloodStop system. It can detect water on the floor behind the washer and automatically shut off the water supply using those solenoid valves. It is powered both with AC as well as a battery backup and works great.)
Thanks for my MagVent!
-Keith C.
A MagVent product, a properly designed duct system, and routine cleaning are the solutions to decrease fire hazards, boost dryer efficiency, and save energy and space!
https://www.instagram.com/magventdryervent/
https://twitter.com/MagVentLLC
https://www.magvent-dryervent.com/
https://www.facebook.com/MagVentLLC/

